使用 Playwright 生成测试代码
E2E 测试可以完整测试用户与页面的交互流程,更贴近实际用户操作。目前常见的工具是 Cypress (opens in a new tab),之前尝试使用 Cypress 来执行一些简单的 E2E 测试,但是需要学习的概念过多,只做了初步的尝试。
Playwright (opens in a new tab) 是近年新推出的 E2E 测试工具,相比 Cypress 的优势在于更加简单直观,提供 Codegen 生成测试代码等高效的工具简化测试流程。本文介绍 Playwright 的基本使用,和如何使用 Codegen 生成测试代码。
初始化
使用官方脚手架初始化一个项目。会初始化项目目录结构,安装 Playwright 依赖和浏览器。
npm init playwright@latest生成的目录结构如下:
playwright.config.ts # 配置文件
package.json
package-lock.json
tests/ # 测试目录
  example.spec.ts
tests-examples/
  demo-todo-app.spec.ts
执行 npx playwright test 命令即可执行测试,测试完成后可以查看测试报告。
# 执行测试
npx playwright test
# 查看报告
npx playwright show-report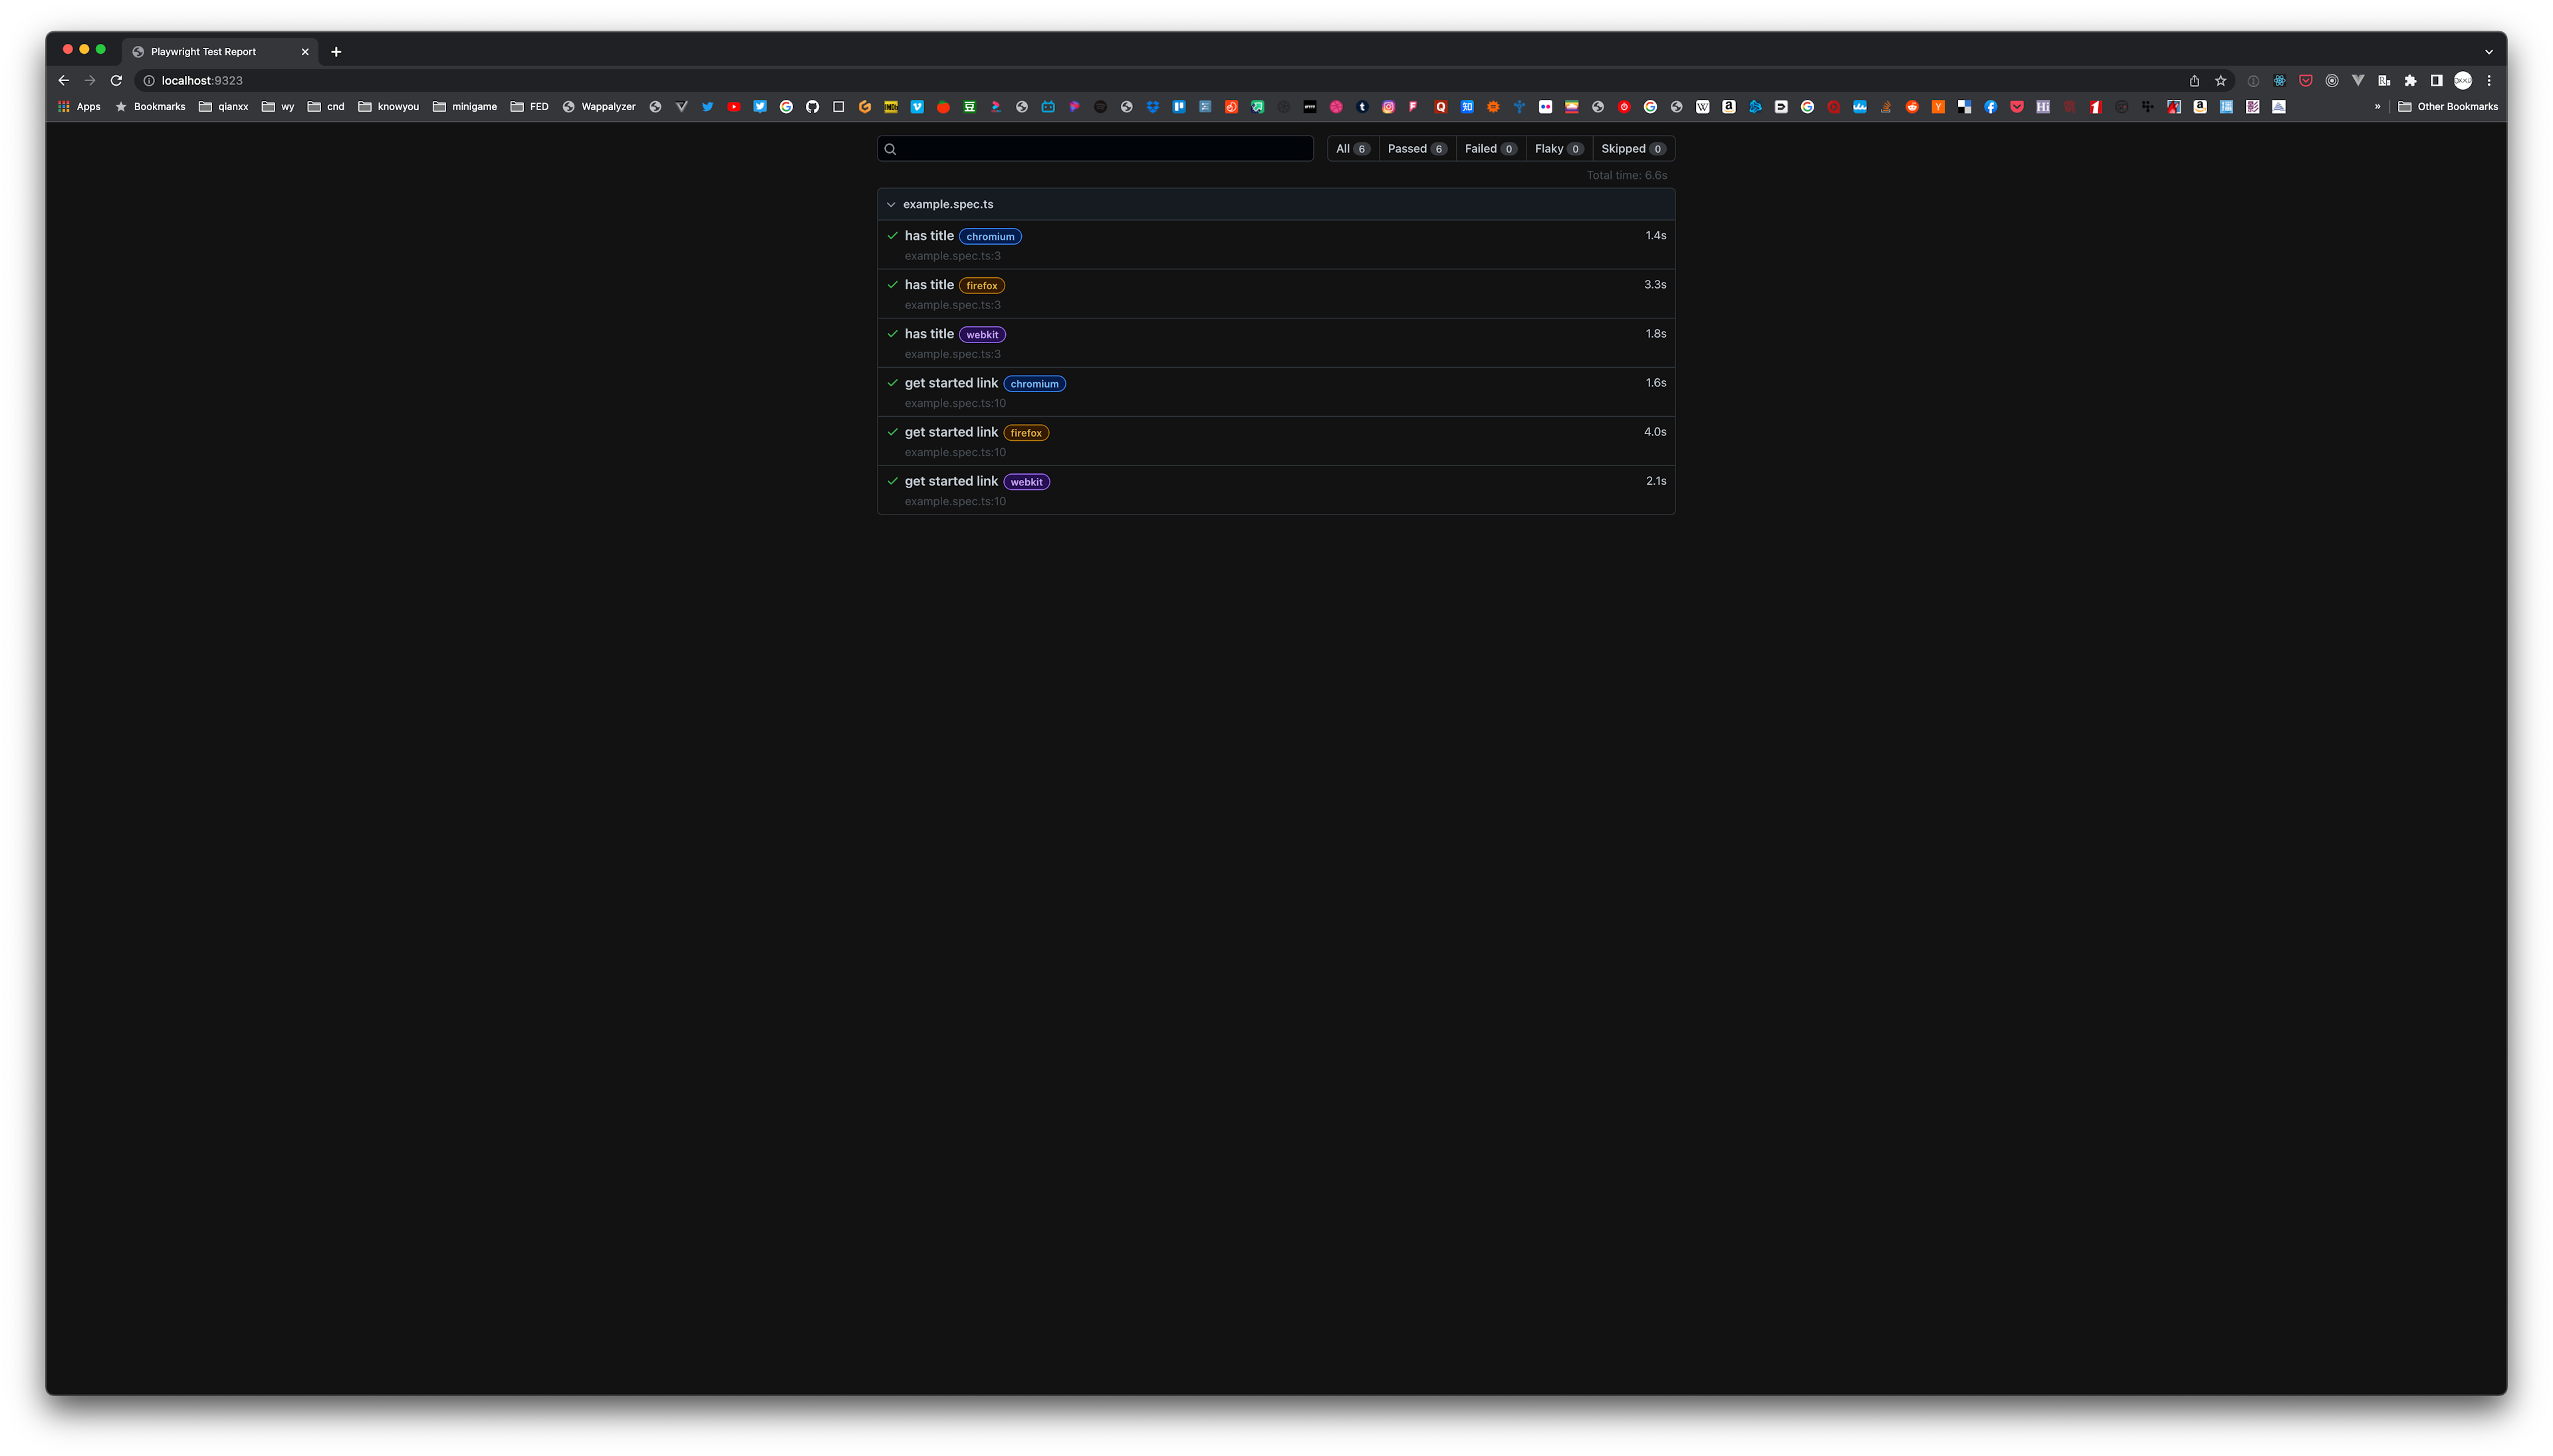
生成项目之后,脚手架也提示了我们常见的命令:
Inside that directory, you can run several commands:

  npx playwright test
    Runs the end-to-end tests.

  npx playwright test --ui
    Starts the interactive UI mode.

  npx playwright test --project=chromium
    Runs the tests only on Desktop Chrome.

  npx playwright test example
    Runs the tests in a specific file.

  npx playwright test --debug
    Runs the tests in debug mode.

  npx playwright codegen
    Auto generate tests with Codegen.

We suggest that you begin by typing:

    npx playwright test

And check out the following files:
  - ./tests/example.spec.ts - Example end-to-end test
  - ./tests-examples/demo-todo-app.spec.ts - Demo Todo App end-to-end tests
  - ./playwright.config.ts - Playwright Test configuration

Visit https://playwright.dev/docs/intro for more information. ✨

Happy hacking! 🎭
使用 Codegen 生成测试代码
接下来介绍本文重点内容,使用 Codegen 生成测试代码。
执行以下命令,打开浏览器和代码生成器。在浏览器中的操作都会在代码生成器中生成对应的代码。
npx playwright codegen这里我们想要测试 https://react.dev (opens in a new tab) 的链接点击跳转是否正常,使用浏览器正常点击链接,就像一个正常用户操作一样。具体操作示例可以见视频:

生成的代码如下:
import { test, expect } from "@playwright/test";

test("test", async ({ page }) => {
  await page.goto("https://react.dev/");
  await page.getByRole("link", { name: "Learn", exact: true }).click();
  await page
    .getByRole("link", { name: "Tutorial: Tic-Tac-Toe", exact: true })
    .click();
  await page
    .getByRole("article")
    .getByRole("link", { name: "Learn React" })
    .click();
});
生成代码之后,只需要我们手动加上测试用例对应的断言代码来判断是否正确。在点击链接的代码之后加上断言,通过地址栏的地址判断是否正确跳转点击操作对应的链接。
加上断言之后的代码如下:
import { test, expect } from "@playwright/test";

test("should navigate", async ({ page }) => {
  await page.goto("https://react.dev/");
  await page.getByRole("link", { name: "Learn", exact: true }).click();
  // 断言:点击跳转 Learn 之后,地址应该以 learn 结尾
  await expect(page).toHaveURL(/learn$/);
  await page
    .getByRole("link", { name: "Tutorial: Tic-Tac-Toe", exact: true })
    .click();
  // 断言:点击跳转 Tutorial: Tic-Tac-Toe 之后,地址应该以 tutorial-tic-tac-toe 结尾
  await expect(page).toHaveURL(/tutorial-tic-tac-toe$/);
  await page
    .getByRole("article")
    .getByRole("link", { name: "Learn React" })
    .click();
  // 断言:点击返回 Learn React 之后,地址应该以 learn 结尾
  await expect(page).toHaveURL(/learn$/);
});
接下来执行测试,查看测试是否正确运行即可。这里我们使用 UI 模式运行, UI 模式相比命令行执行更直观,可以直接看到每次运行测试的步骤和截图,调整测试的目标和配置。
npx playwright test --ui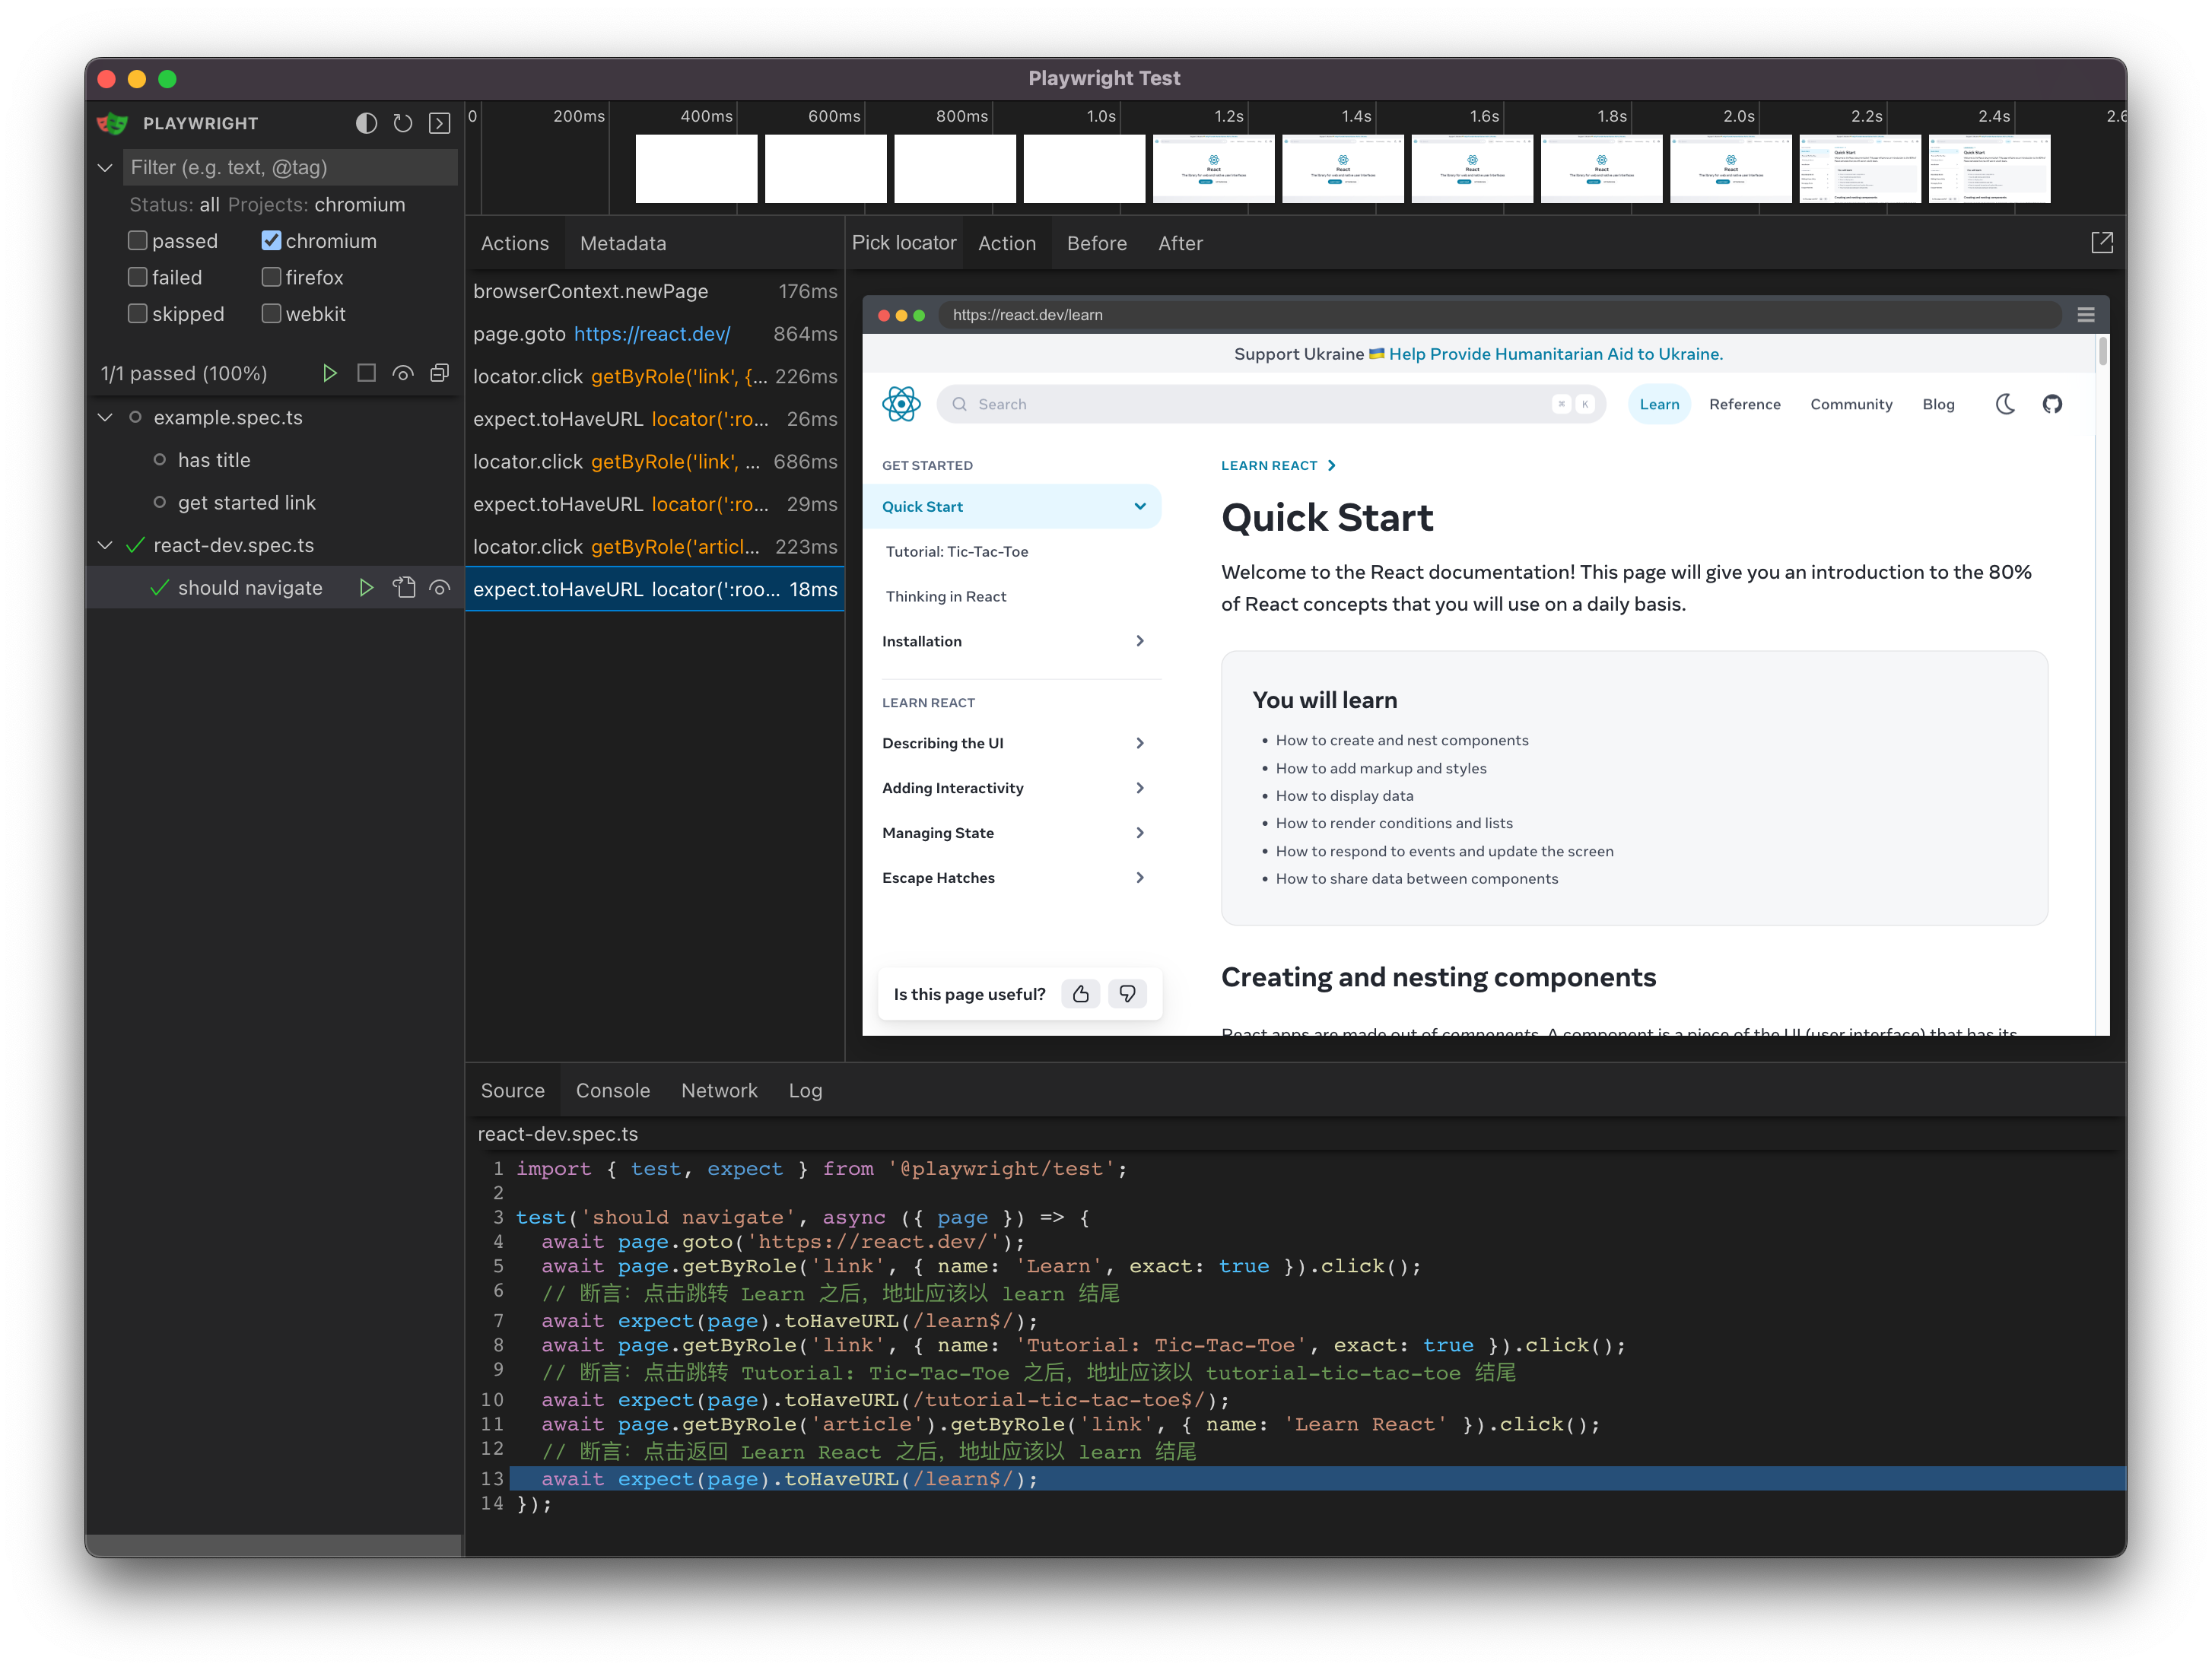
Tips
如果安装了 VS Code 插件 (opens in a new tab),可以直接在 VS Code 中执行测试和生成代码等操作,会更加方便。
参考链接
- Playwright (opens in a new tab)
- Playwright Test generator (opens in a new tab)
- Playwright VS Code (opens in a new tab)